PASSFORT, a password Manager for the TI-99/4A.
Introduction
PASSFORT is a password management application I developed specifically for the Texas Instruments TI-99/4A home computer. It stores, retrieves, and manages your passwords directly from your TI-99/4A.
Why build a password manager for the TI-99?
Well, for starters, it’s not connected to the internet—so good luck hacking it remotely. Hardly anyone remembers how to use it, and you can stash your encrypted passwords safely on a floppy, TIPI, or Gotek. Add a fake label like “Justin Bieber Mix” or “Chess Tournament 1983”, and boom—security through obscurity, retro-style! 😄
Features:
- Manage a total of 240 passwords, each consisting of a 25-character description, username, and password.
- Your data is stored using the XTEA encryption algorithm.
- Add, delete, and search by keywords easily.
- Store on floppy, TIPI, Gotek, etc (Cassette coming in a future version).
- Easy navigation with pagination.
- Import your passwords using a CSV file.
Note: PASSFORT uses the XTEA algorithm to encrypt your data. While XTEA has some limitations and isn’t as secure as modern encryption standards, it offers a good balance between security and low memory/CPU usage—an important consideration when working with a 45-year-old computer like the TI-99. If you’re curious, I encourage you to learn more about XTEA on Wikipedia.
What you need:
- Your TI-99/4A (warning: PASSFORT does not work on the beige TI-99)
- The 32K memory extension
- A storage device to store your passwords (Cassette not supported on version 1.0)
Best Practices
Follow these rules:
- Always back up your vault to two separate locations For example, save it on two different diskettes. From the main menu, press “S” to save, then change the destination drive to back up to a second disk.
- Always quit properly When you’re done using PASSFORT, press QUIT (FCTN + =). This ensures the sensitive data in memory is securely wiped. ⚠️ Note: Simply powering off the console does not erase the 32K expansion memory. This applies to systems using the PEB; behavior with sidecar expansions may vary.
- Use strong passwords Choose long passwords that include a mix of uppercase, lowercase, numbers, and symbols. This applies to both your vault password and the passwords stored inside it.
- Avoid predictable passwords Don’t use dictionary words, personal names, or anything easily guessed.
- Never reuse passwords Each account should have a unique password. Reusing passwords puts all your accounts at risk if one gets compromised.
- Don’t use personal info. Avoid using your name, birthdate, pet’s name, or anything someone might guess.
Getting Started
Just insert the Command Module and start your TI-99, then select option 2

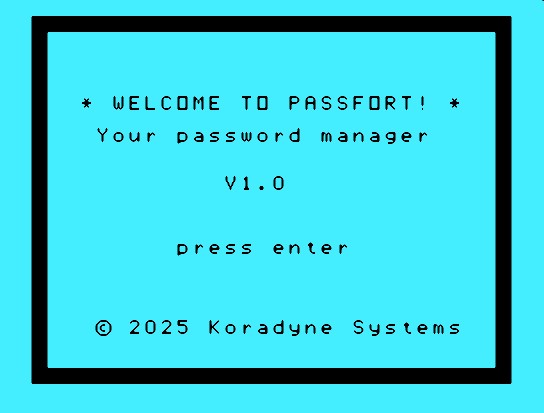
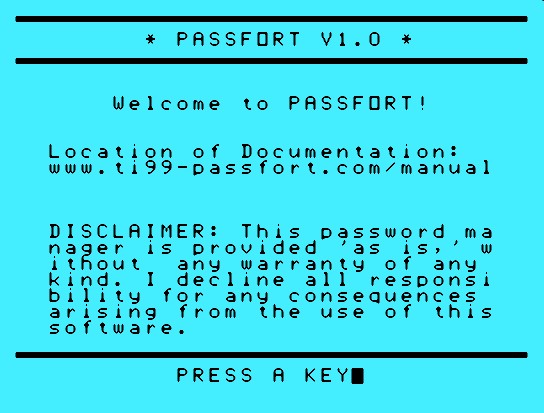
Welcome Screen
After selecting #2, you get the welcome screen:
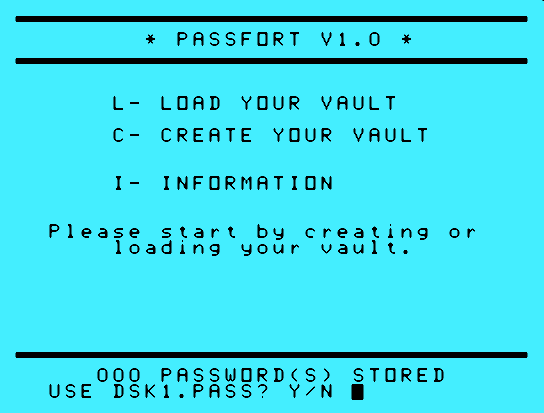
The Main menu
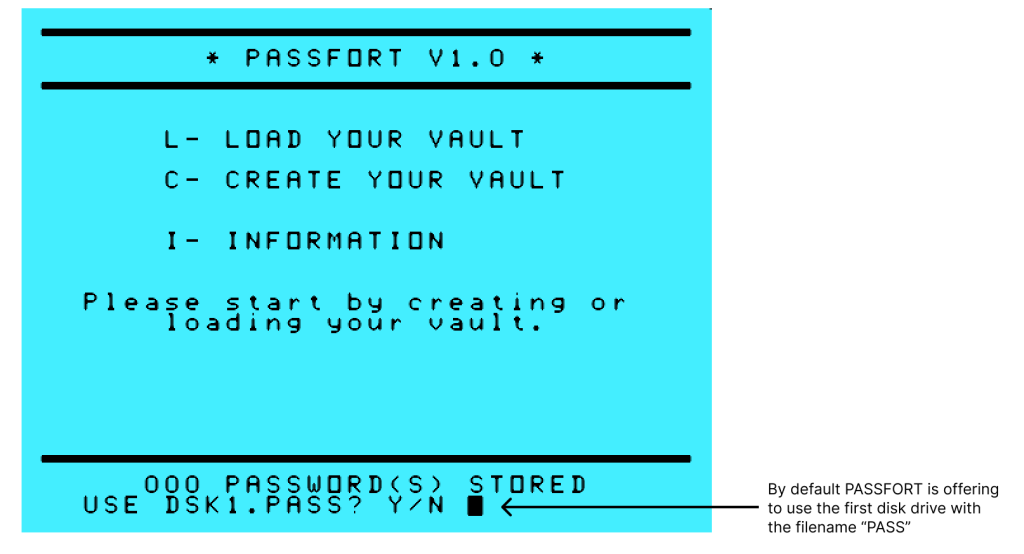
The main menu shows 3 options when your vault (the vault containing your passwords) is not loaded.
- “L” – Load your vault from a media
- “C” – Guides you to create your vault
- “I” – Gives you the details about where to access the documentation and a warning message
Create you vault
Unless you already have loaded your vault, the first step is to create one. To do this, hit the “C” key.
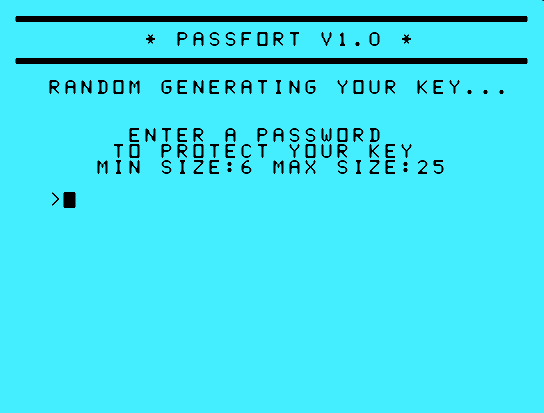
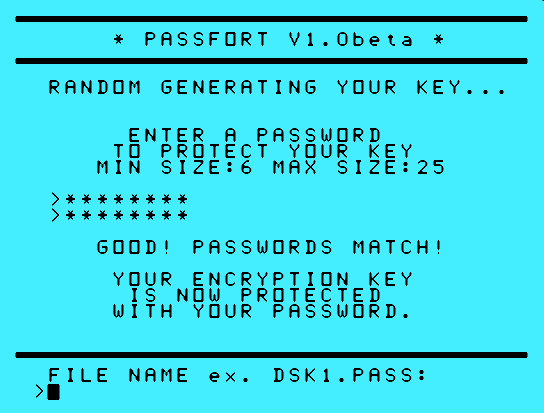
You’ll be presented with a screen where:
- An encryption key is generated for you.
- You must create a password to protect this key—and by extension, your vault.
Your password must be between 6 and 25 characters. Use a long password with a mix of letters, numbers, and symbols for better security. You’ll need to enter your password twice to confirm it and ensure there are no typos.
⚠️ Make sure the “Alpha Lock” key isn’t accidentally enabled unless you intend it to be.
The screen where you enter your password:
Once the password is verified, you’ll be prompted to save your vault.
You can either accept the default option (type “Y”) or specify a custom location (type “N”) by entering your preferred device and file path.
The format should be <device>.<file> like DSK1.PASS ⚠️ in capital letters ⚠️ as the by default presented here:

If you decide to not use the default location, you can hit “N” and enter your own file destination:
Once the vault is saved, you’ll be taken to the main screen.
At the bottom, you’ll see the file path where your vault has been stored and the number of passwords stored.
⚠️ An asterisk (“*”) will appear next to the “S” save option to indicate that changes have been made in memory but not yet saved—such as when you add or delete or add a password:
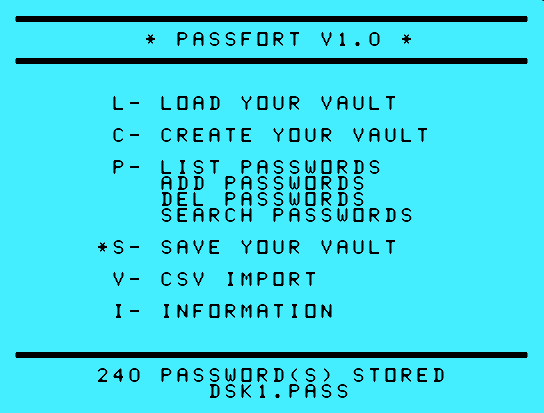
Once you’ve finished working with your vault, be sure to save your changes using the “S” option.
⚠️ Save your vault on multiple media to be sure you have copies.
Always quit properly When you’re done using PASSFORT, press QUIT (FCTN + =). This ensures the sensitive data in memory is securely wiped. ⚠️ Note: Simply powering off the console does not erase the 32K expansion memory. This applies to systems using the PEB; behavior with sidecar expansions may vary.
When you quit, PASSFORT will display a message confirming that memory is being wiped:
Load your vault
To load your vault, press “L”. By default, it will look for a file named PASS on DSK1. You can change the device and file name by pressing “N”. While loading it will ask for your vault password.
⚠️ WARNING: If, after loading your vault, you see gibberish or unreadable characters, it means the password you entered was incorrect.
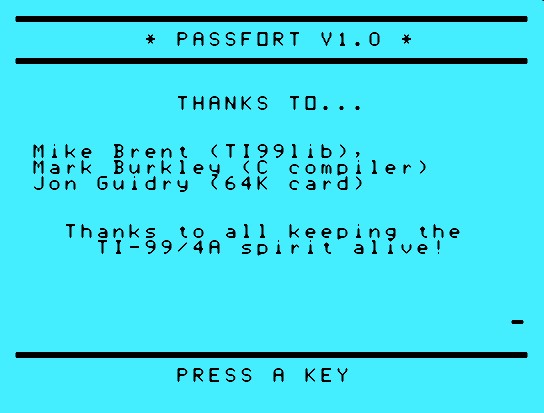
Information screen
This screen provides a link to the documentation and displays an important warning message. The second page includes acknowledgments to Mike and Mark, whose contributions to the TI-99 community made this software possible. It also displays the cartridge’s unique serial number, specific to each unit.
Managing your passwords
To manage your passwords—add, delete, or search—press “P” from the main screen.
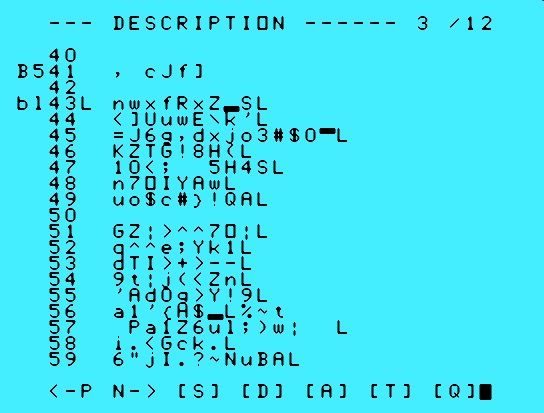
You end up on the password management screen. Here’s a breakdown of the screen layout.
- Header Section (1) (2) (3): At the top, the active column (
DESCRIPTION) is shown, along with the current page indicator (page 1 of 12). To sequentially show the different columns of the line, such as the user name and password, use the[T]key. - Data Table: It has 20 lines. Each line is numbered (0–19) and displays the current active column
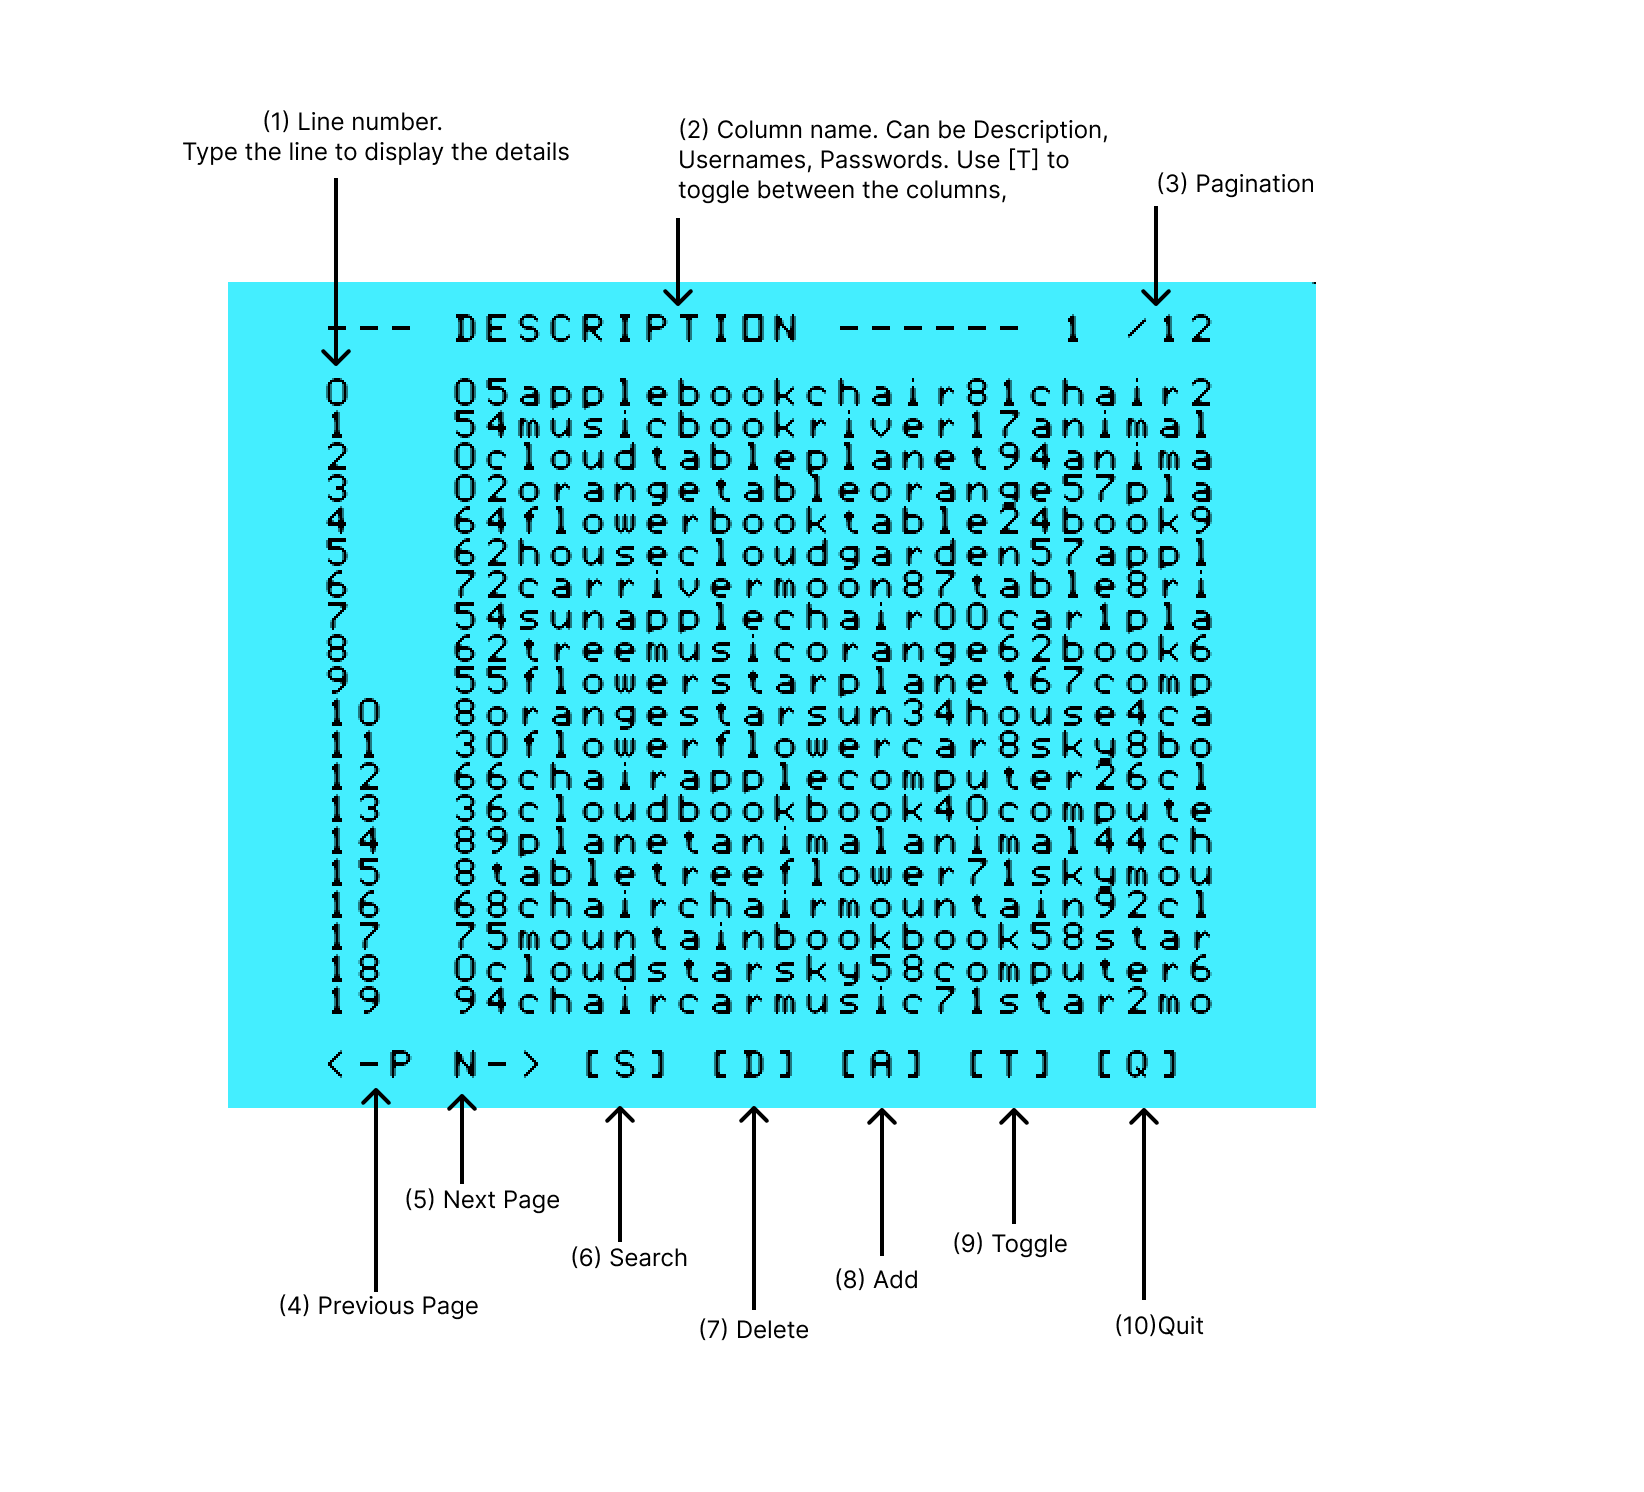
Main Interface Commands
- (4) N – Next page of passwords
- (5) P – Previous page of passwords
- (6) S – Search for a password
- (7) D – Delete a password
- (8) A – Add a new password
- (9) T – Toggle between the description, user name, and password
- (10) Q – Quit for the main menu
Adding Passwords
- Press
Ato add a new password. - Follow on-screen prompts to enter the description, username, and password.
Deleting Passwords:
- Press
Dto enter delete mode. - Enter the line number corresponding to the password you want to delete.
- Confirm deletion as prompted.
Searching Passwords:
- Press
Sto search. - Enter a keyword. It will be searched across all columns (Description, Username, Password).
- Press
Qto exit search mode.
Toggle Column Visibility:
- Press
Tto toggle between all columns.
Exiting the password management screen:
- Press
Qat any point outside a submenu to got back to PASSFORT main menu.
Notes:
- Encryption/Decryption takes time because the encryption algorithm must go through a minimum number of rounds to make it as safe as possible.
- Due to the TI-99’s limited memory, PASSFORT performs encryption and decryption sequentially during the save process.
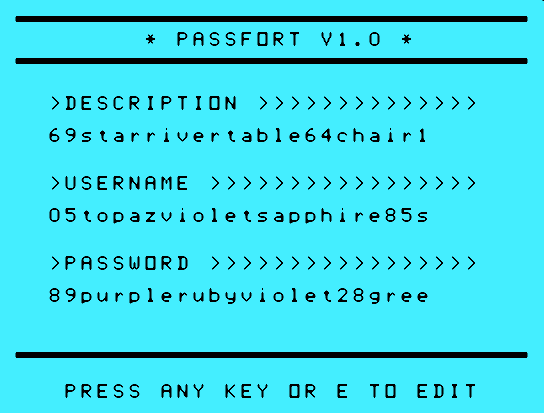
💡 Interaction Tip: To view a password’s details or edit it, type its corresponding line number, then ENTER.
Importing your Passwords using a CSV file
You can import passwords from a CSV file. Please follow these requirements:
- Maximum of 240 lines
- No header row
- Each line must contain a description, username, and password, separated by commas
- Each field must be no more than 24 characters
- Each line must end with a Carriage Return + Line Feed (CR/LF)
- The import file must be ANSI encoded NOT UTF8 (check the first 3 bytes of your file. if you get EF BB BF in hexadecimal this is the Byte Order Mark (BOM) for UTF-8 encoded files).
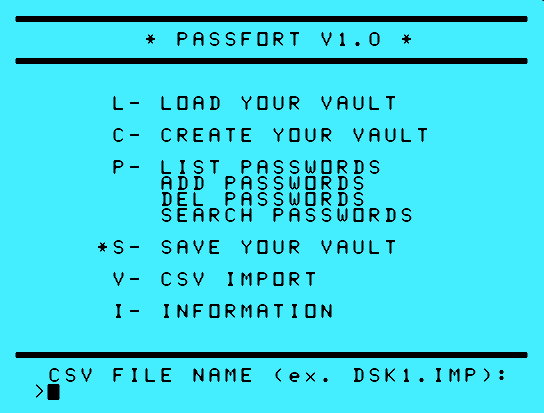
To start the import, press “V”.
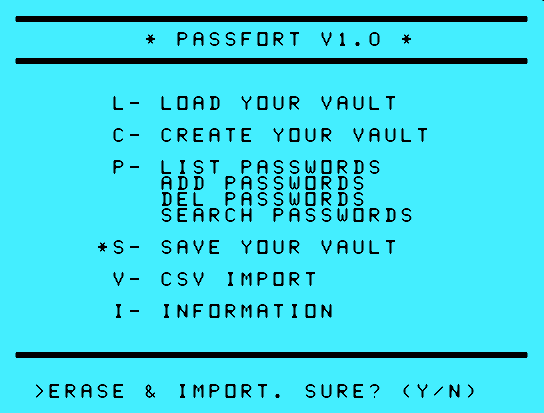
You’ll then be prompted to enter the file name:
And to confirm:
PASSFORT will continue to evolve. Stay tuned for updates, and thank you for being part of the TI-99/4A community.
Brought to you by
DISCLAIMER
PASSFORT is provided “as is,” without any warranties of any kind, whether express or implied, including but not limited to warranties of merchantability, fitness for a particular purpose, or non-infringement.
The author makes no representations or guarantees regarding the security, reliability, or performance of this software. By using PASSFORT, you acknowledge and agree that you do so entirely at your own risk.
In no event shall the author be held liable for any loss or damage, including but not limited to data loss, security breaches, or any other consequential, incidental, or indirect damages arising from the use or misuse of this software.
PASSFORT is intended for use on vintage computing systems without network connectivity. Using it on modern, internet-connected systems may reduce its intended security benefits.